Dog nail trimming, also known as a pedicure, is a necessary part of effective dog grooming and should be done once every 3 to 4 weeks.
It’s a good idea to have a vet or professional groomer show you the ropes the first time around. Have them do the first two paws and then have them watch you do the second two. If you don’t feel comfortable, the pros will usually do it as a part of their overall grooming service or on an “a la carte” basis.
And don’t worry – if done correctly, dog nail trimming will be completely painless for your dog (and for you!).
Effects of Not Trimming Dog Nails
Your dog may squirm during the first couple of dog nail trimming sessions, but whether they know it or not they will be happier because of your efforts. Several health issues can arise if the nails are neglected, such as:
- Painful ingrown nails
- Nail bleeding if the “quick” (blood vessels that extend into the nail) gets too long
- General discomfort in feet, legs and hips due to shifting weight as a result of long nails
Which Dogs Do Not Need Their Nails Trimmed?
Trimming dog nails is not necessary for all dogs, and some dogs need it less than others. If you have an indoor dog, chances are they will need it. And dogs with faster-growing nails such as Basset Hounds and Dachshunds will probably need it more frequently.
Outdoor dogs, on the other hand (or paw, as it were), are more likely to wear their nails down on their own by constantly scraping them on the ground.
How to Tell if Your Dog’s Nails Are Too Long & Avoiding the “Quick”
Imagine your dog’s paw resting pads-down on an invisible horizontal line, where the bottom of the pads is barely touching the line. When viewing their paw from the side, if their nails extend below the invisible line you know they are too long.
Your goal should be to cut away the extra nail below the invisible line, being careful to not cut the “quick”. The quick are blood vessels that run down into the nails and can usually be seen as a darker area within lighter-colored nails.
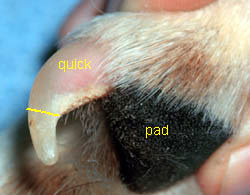
Dog nail trimming essentially works the same for your dog as it does for you. When you cut your own fingernails, you will go pain-free as long as you don’t cut the part of the nail that is still attached to your skin. Cutting below the quick works the same way.
If you do happen to cut the darker part (it happens to us all from time to time), the nail will bleed. It is a good idea to have a commercial blood coagulants (i.e. styptic powder) handy in case this happens (follow the directions on the packaging).
If the quick is close to the end of the nail, don’t trim – file. Daily filing will cause the quick to pull back in a few weeks and allow you to start trimming.
The Best Way to Trim Your Dog’s Nails
As a rule of thumb, filing or trimming dog nails is better done in small amounts more frequently instead of large amounts every once in a while. Again, once every 3 to 4 weeks should do the trick.
The first step is to make sure that there are no problems with the feet, such as bleeding, redness, swelling, discharge or ingrown nails. If any of these are present, see a vet immediately.
Next, make sure you sterilize your tools before and after each session. By the way, here are the tools you will need…
| Dog Nail Trimming Tools |
|---|
| Here are the tools you’ll need to do the nail-trimming job right. These links will take you to some good options we found from various online retailers… |
Now, let’s get on with how to get the job done…
- Ideally, your dog will sit still and allow you to trim or file away. As with any interaction, the younger you start dog nail trimming the easier it will be to get them used to it. If your dog is a squirmer, you will either need to hold them down or get someone else to hold them down. If you’re flying solo, it’s easiest to put them on a table and lean over them so you can use your body weight if necessary.
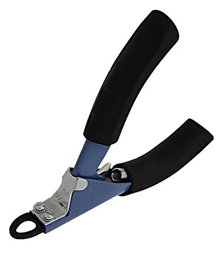
- Take a look at the color of your dog’s nails. If they are light and you can see the quick inside, use your guillotine-type clippers (pictured above) to cut just below the quick.
 If they are dark and you cannot see the quick, use the guillotine-type clippers but only cut very small bits off the end at a time. It’s time to stop when you begin to see the grayish-colored quick through the cut end of the nail.
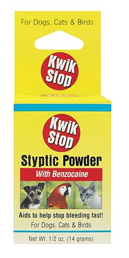
- If you accidentally cut the quick, use the styptic powder (pictured right) to stop the bleeding. Be sure to brush away the excess powder, as not doing so will make the seal more likely to break and cause the bleeding to resume. Note that the powder does sting for some dogs, so if your dog absolutely hates it, don’t worry about it. The nail should stop bleeding within 5 minutes.
- Grab your nail file and work the end of each nail until they are soft (do not do this on nails that have bled).
- Don’t forget the dew claws! Those are the nails about 1 to 3 inches above the inside of the front (and sometimes rear) feet. Some dogs, like the Saint Bernard, even have two sets of dew claws on their back feet.
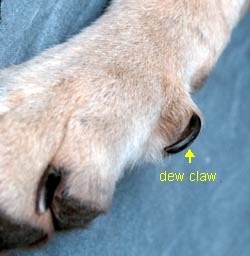
The dew claws never wear down since they don’t touch the ground, so you may have a honker of a nail on your hands. If the dew claws have grown into a circular loop, cut them with your scissor-type nail clippers first (being sure not to get too close to the quick), then go to work with the guillotine-type clippers and file as discussed above.
- Praise the heck out of your dog and give them their favorite treat after each session!
Do you believe in holistic pet care? If so, please tell your friends about us. Thank you for supporting our efforts!
